Assistance for use
Main menu
- Game button, click here to select a game
- Help button, click here to go here!
- About us button, click here for a little description about us
- GTC button, click here to find the different terms of use
- FAQ button, click here for frequently asked questions
- Language selector, here you can choose the language of the application
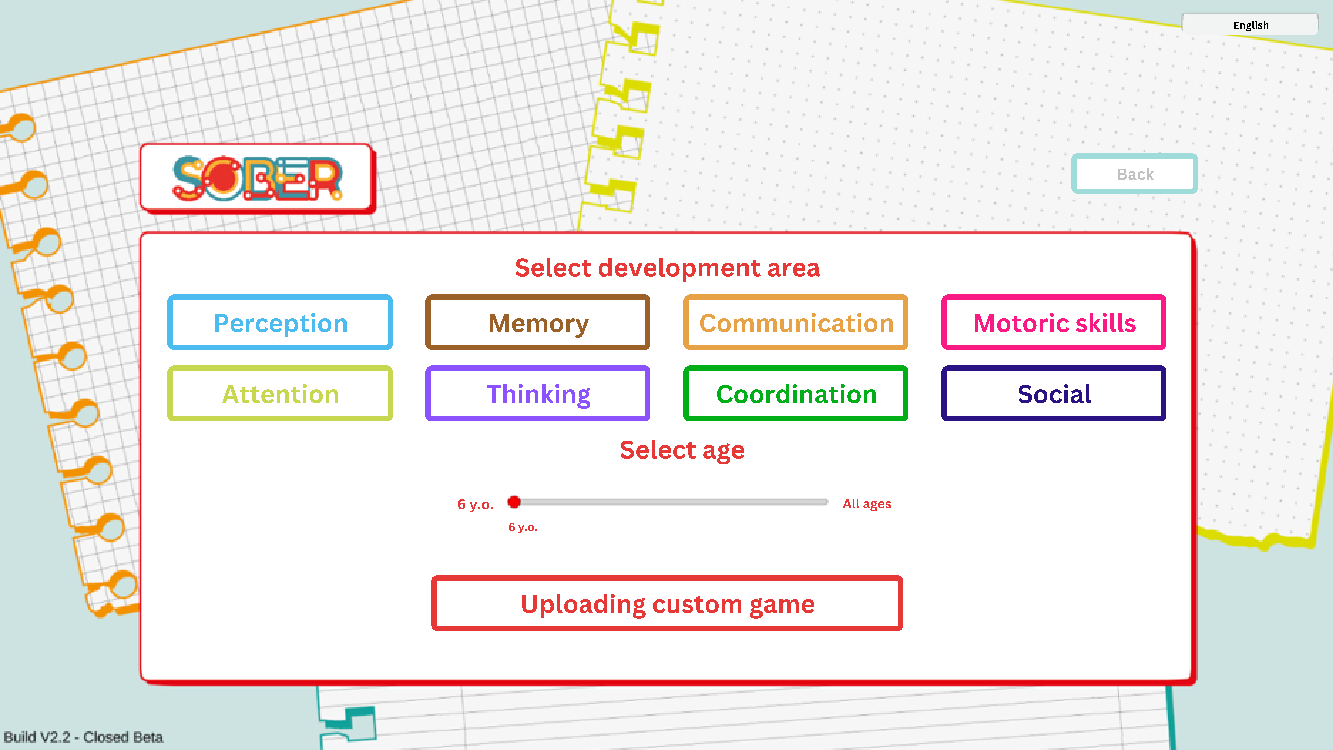
Area of development
You can choose from 8 individual skills. Each category contains tasks to develop a specific skill.
You must also select a target age range. You can do this by moving the slider. If you move it all the way to the right, all the tasks in that category will be displayed.
If you click on the “Upload your own game” button, you can upload your own game created in the editor.
The SOBER Complex Development Program aims to reduce inequalities in the learning outcomes of disadvantaged students, which is also crucial for strengthening social cohesion.
Game Selection
In this panel you can see a filtered list of tasks to choose from. If you click on one of them, the task will be loaded.
Note: The numbering is intentionally not in order from 1 to infinity. Each exercise has its own number to make it easier for teachers and parents to find the exercise.
A precise pedagogical development programme for teachers and parents has been drawn up to this, and can be found in the About Us section.
In the game
You can read the instructions when a task is loaded. After reading it, you can close the window by clicking on the “X” in the corner.
If you want to read it again, you can click on the “I” icon in the top right corner to open it again.
There is a “back” button on the left which takes you back to the game selection panel.
You can choose from four different mouse modes:
- Move
o You can move items
- Select
o Use this when the task tells you to select an item by clicking on the items in this mode. You always get some visual feedback. You should also use this mode when you need to find something in a picture!
- Colouring
o If you click on a colourable item, you can change its colour. You can do this by holding down the left mouse button and dragging it to a colour when the palette appears.
- Rotate
o When prompted by the task, you can rotate the elements in this mode. To do this, click and hold down the left mouse button while dragging.
To deselect an item from a group, click on it with the middle mouse button.
The currently active mouse mode is indicated on the left side of the application. It will always be grey.
You can switch between modes by pressing the “Q,W,E,R” keys or by clicking the corresponding button on the left or by opening the mouse mode selector.
You can open the mode selector by holding down the left mouse button on an empty space. Four icons will then appear, the largest will be the new mouse mode!
If a speaker icon appears, you will need to click on it with the “drag” mouse mode to hear the sound!
Editor
General operation
Task storage
In order to use the task editor to its full potential, you need to know how the task framework works.
Each task is stored in a JSON (JavaScript Object Notation) file. This is a format that is easily readable by both the application and people. The created tasks are stored and distributed by moving these files.
Example: One student prepares a task and downloads it, which is then sent in some way (Teams, Classroom, Pendrive) to the teacher, who checks it and forwards it to the student who has to complete it.
Task evaluation
Each task consists of two parts. First are the elements. Each element has its own properties.
- Name
o This determines which icon should appear
- Random placement
o Places items randomly at startup.
- Like this: if it is active for at least 2 items, then on startup, it will collect all these items and shuffle their positions. Similar to shuffling a deck of cards
- Position
o The position where it will appear on the playing field
- Can it be moved
o In move mode, is it possible to move the item?
- Is it background
o If it is a background, it will be 5x the size of the regular element and cannot be interacted with
The evaluation is based on different conditions. If all the conditions are true, the task is considered complete and a progress icon is displayed.
Scenes
Each task consists of scene(s). Each scene has its own set of conditions that must be fulfilled in order to proceed to the next scene.
You can always move backwards.
Conditions
Rotation
A given element must be rotated to the specified angle.
Drag to a given position
Here you can give an item a position to move it to (e.g. next to an icon on the pantry shelf)
Colouring
This condition can only be applied to elements that are suitable for colouring. These can be found in the Element Selector under the elements that can be coloured.
You can specify which colour a particular element should be coloured to.
Selection
All elements must be specified with the incorrect solutions and then the correct solutions must be added.
The task is to select the good ones from all the given elements.
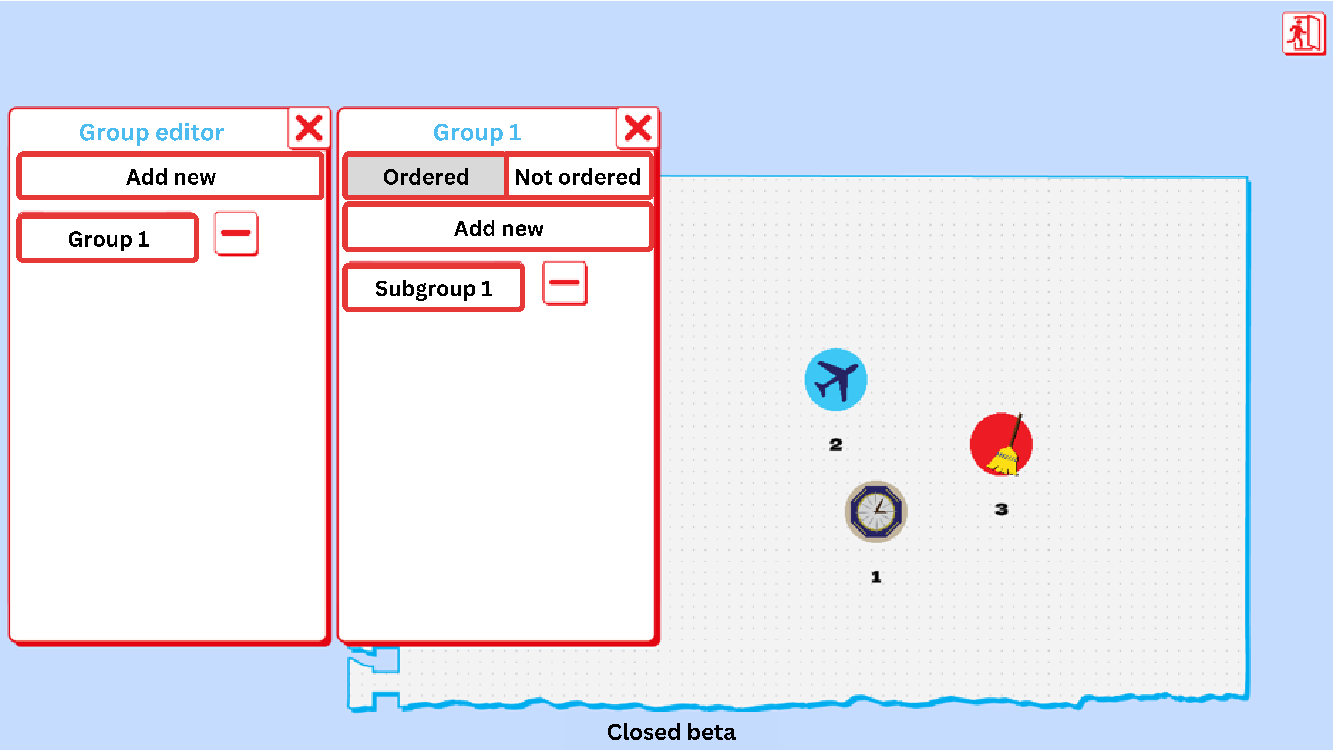
Grouping/Pairing
You can specify which element should be paired with which element.
The algorithm works with the group/subgroup method as shown in the following picture.
First, it goes through each subgroup and checks that all the items are in the subgroup.
If all the subgroups match, then checks that each subgroup is linked to all the necessary subgroups.
Two subgroups are considered linked if any element of subgroup A is linked to any element of group B.
In the case shown in the figure, the group system looks like this:
- Subgroup
- A1
- Subgroup
- B1
- Subgroup
- C1
- C2
- C3
- Subgroup
- D1
- Subgro
- E1

In addition, it must be decided whether the relationship between the groups/subgroups is ordered or not.
If it is ordered, the order matters, if it is not ordered, it does not.
In the previous example, the group is ordered because the order of the subgroups counts (they must be connected in order by shades), but the subgroups are disordered because, where there is one element, it does not count, of course, and for subgroup C it does not count which green hoop comes after which one. (Because you couldn’t even hit that on purpose)
Text content
For text boxes, you can decide whether text is mandatory or optional to proceed.
For example, in a task where the goal is to write a word in syllables, it is mandatory to include text.
However, in the case of an opinion piece, it is not obligatory.
The editor
Launch
You can access the editor from the application’s main menu by clicking on the editor button.
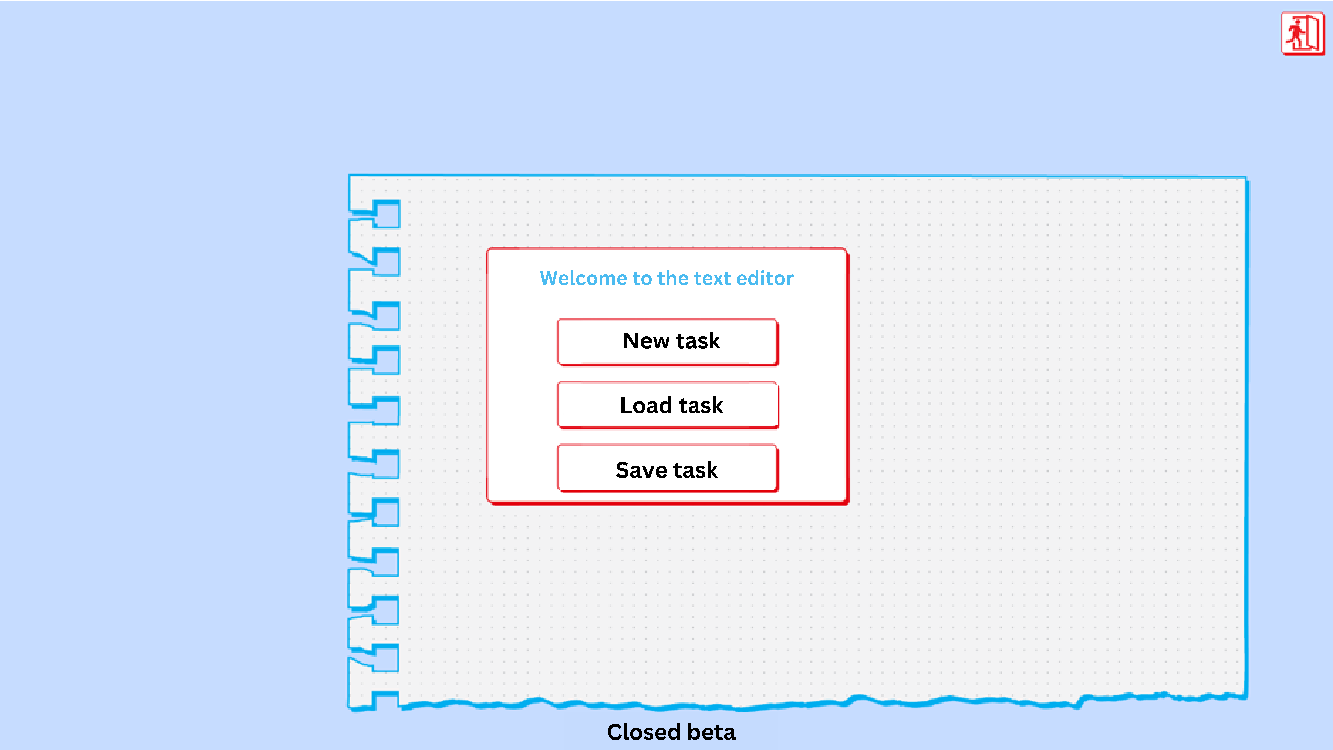
Task menu
After loading the editor, you will find yourself in the task menu, where you can create a new task, upload and edit an existing one or save the current task.
You can access this menu at any time by clicking on the top right-hand corner.
Baseline view
On the left side is the function panel (1), open the different editors with buttons to add a new element or text box.
Above is the cursor mode selector (2), where you can choose between cursor modes.
- Editing
o Edit a given element
- Move
o Move elements around the playing field
- Delete
o Delete an item
Scene editor
Here you can add and delete scenes. There must always be one scene.
Instruction
Here you can enter the text of the given task, which will be displayed when the task is loaded Add an element
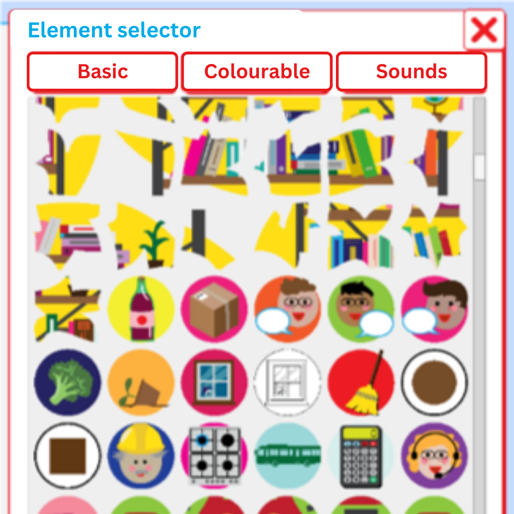
Adding an element
Here you can access the element catalogue, from where you can add new elements.
Textbox
Place a text box.
Selection editor
Here you can set the selection conditions.
Group Editor
Here you can set the group conditions.
You can assign an element to a subgroup by entering the numbers assigned to the elements.
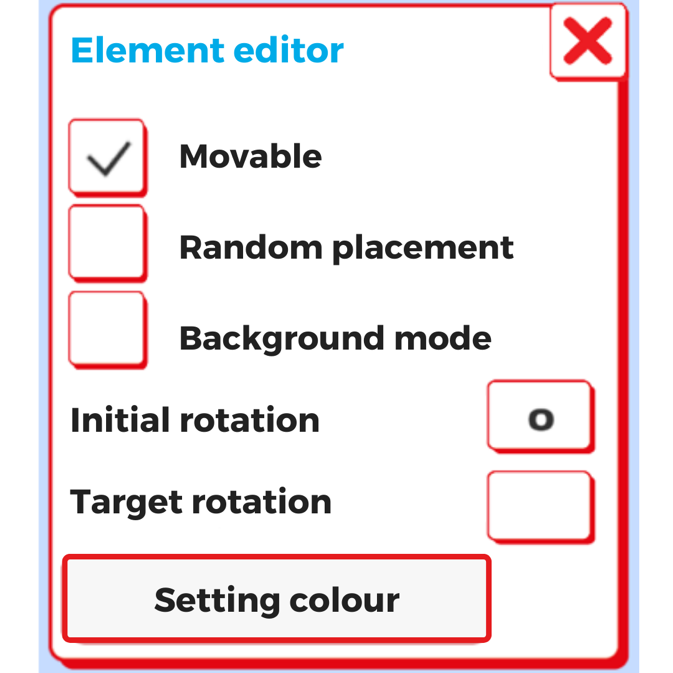
Element Editor
When you click on an element in “Edit” mouse mode, the Element Editor appears.
Here you can edit the properties of an element.
If an element can be coloured, here you can specify which colour it should be coloured.
If you want an element to appear in a rotated position, you can set this by initially rotating it.
If you want an element to be rotatable, you can also specify that here with the target rotation value.
Elements can only be rotated by a whole 30 degrees, so the application will constantly correct this!
Launch a custom task
Custom tasks can be started from the game menu by clicking on the “Upload custom game” button.